Read what to keep ready first. The single biggest mistake: logging in with a brand-new Facebook account. Use your everyday personal Facebook account — Meta trusts accounts with history.
The two ways to connect
Keep using WhatsApp on your phone too (recommended): if your number already runs on the WhatsApp Business app, you connect it to the API and keep the app working. Your chats and contacts import automatically. This guide shows exactly that path — it’s the one we used ourselves.
API only: for a new or dedicated number with no WhatsApp installed — you verify by OTP instead of linking the app; the rest of the screens are the same.
The screens, one by one
Start from your dashboard
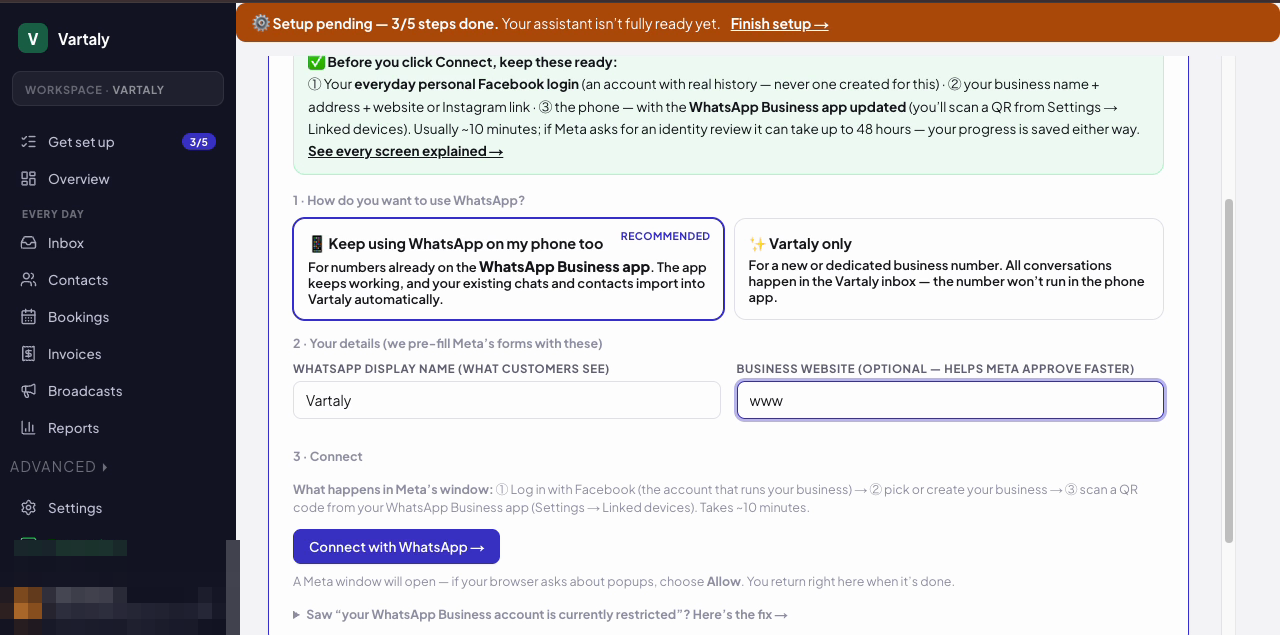
Your Connect page: check the ready-list, pick how you want to use WhatsApp, click Connect. · Real screenshot from an actual connect.
In Vartaly, open Connect WhatsApp, keep “Keep using WhatsApp on my phone too” selected, confirm your display name, and click Connect. Meta’s secure window opens — if your browser asks about popups, choose Allow.
Log in with Facebook
Log in to Facebook
Connect your WhatsApp Business account
Your password goes to Facebook only — Vartaly never sees it.
If your browser is already logged into Facebook (like ours was), this screen is skipped entirely.
Facebook login is required — WhatsApp is owned by Meta, and this is how every platform connects businesses. Use the personal account you actually use, never one created for this purpose.
Select your business portfolio
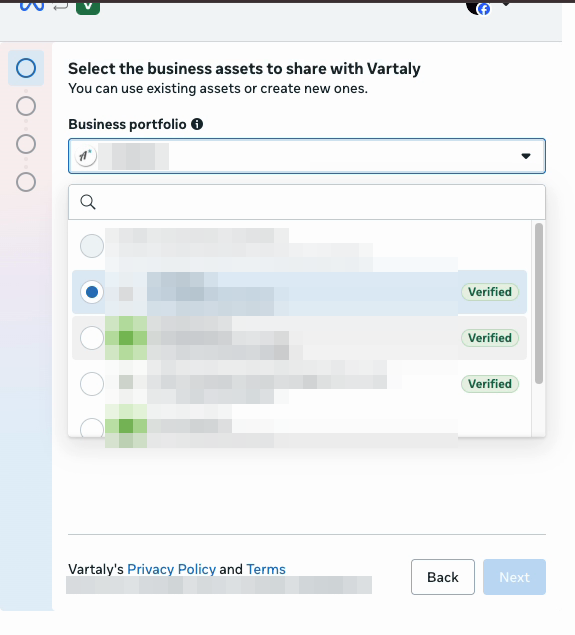
Pick the portfolio that represents your business — Verified ones sail through. · Real screenshot from an actual connect.
If your business already runs a Facebook page or ads, its portfolio appears here — pick it. If you create a new one, fill every field (name, address, website or Instagram, email) — half-empty portfolios get auto-restricted. See the restricted-account guide if that happens; it’s fixable within 48 hours.
Choose “Connect a WhatsApp Business app”
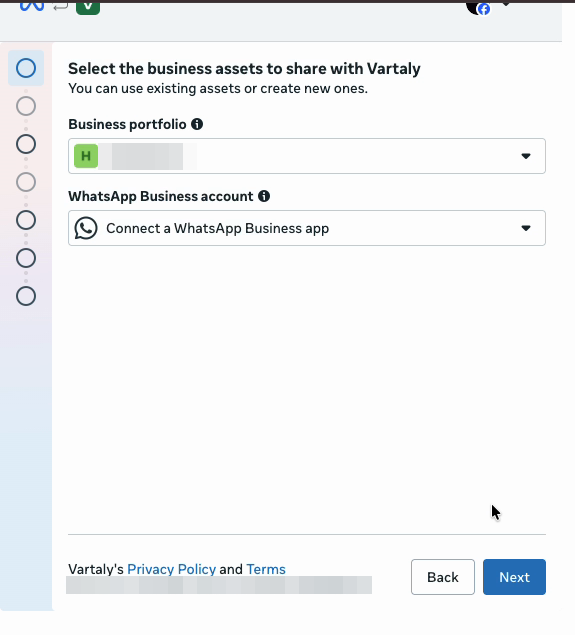
This is the option that keeps your phone app working — not “Create a WhatsApp Business account.” · Real screenshot from an actual connect.
Enter your WhatsApp number
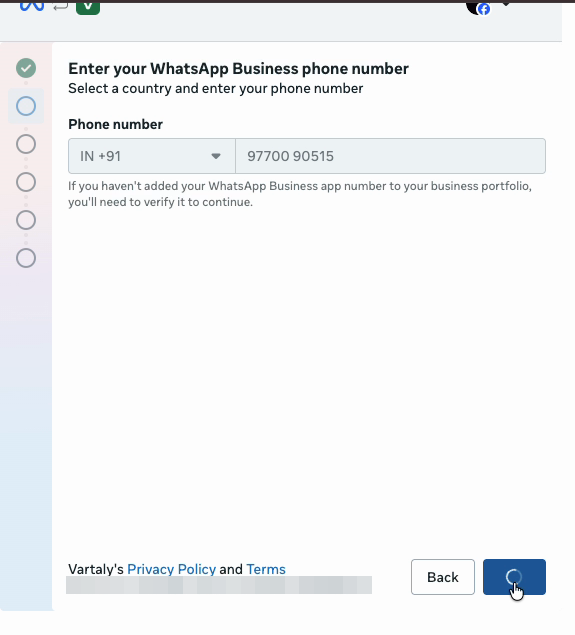
The number that runs on your WhatsApp Business app. · Real screenshot from an actual connect.
Approve sharing — your app keeps working
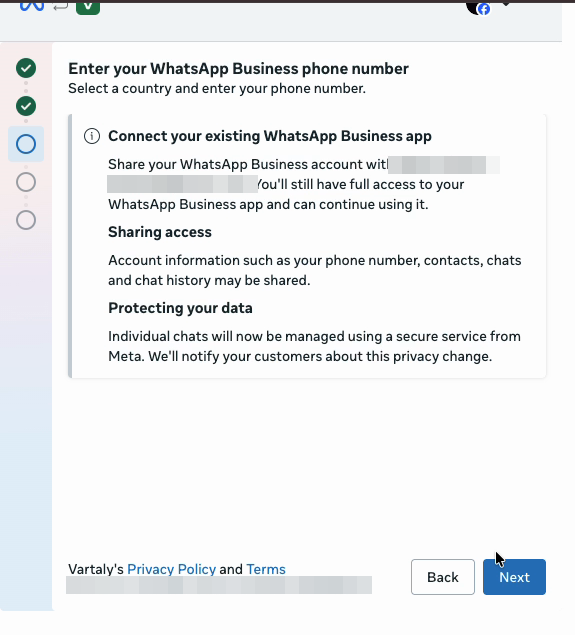
Meta spells it out: you keep full access to your WhatsApp Business app and can continue using it. · Real screenshot from an actual connect.
Import your chats — scan from the phone
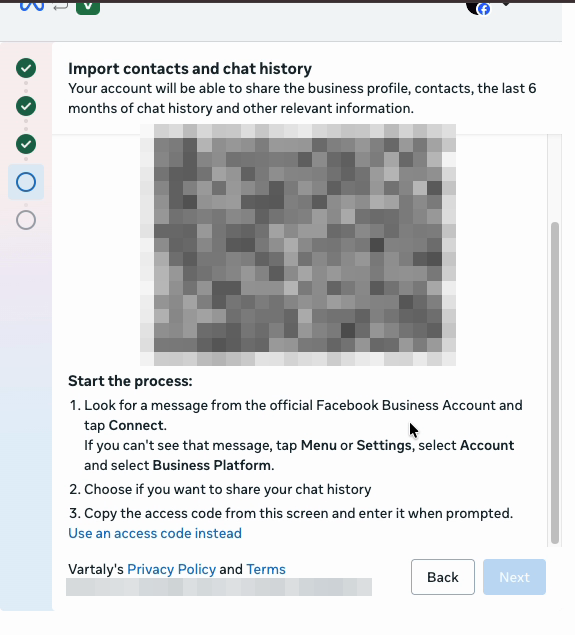
On your phone: open the message from the official Facebook Business Account and tap Connect — or scan this QR / use the access code. · Real screenshot from an actual connect.
This is the magic step: your last 6 months of chats and all contacts import into your dashboard inbox. Here’s the phone side, screen by screen — also real screenshots from the same connect:
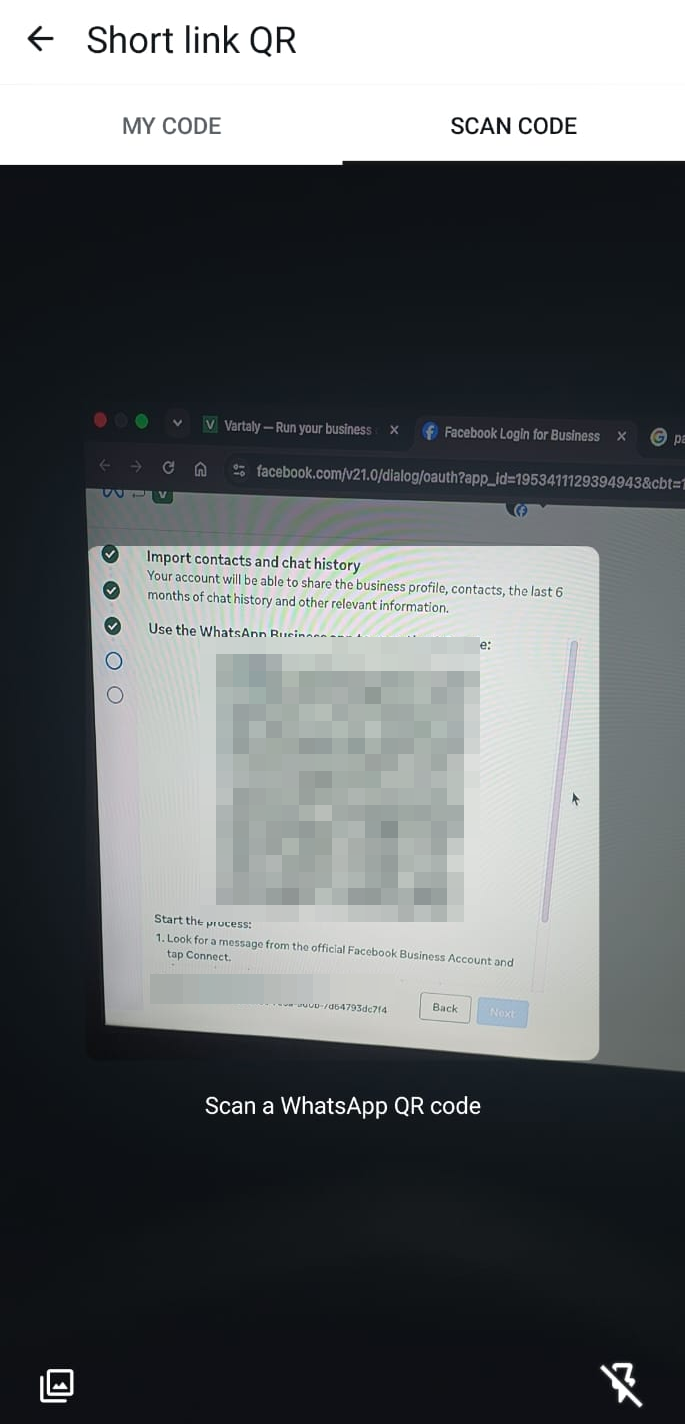
Scan the laptop's QR from the WhatsApp Business app (or open the message from the official Facebook Business Account). · Real screenshot from an actual connect.
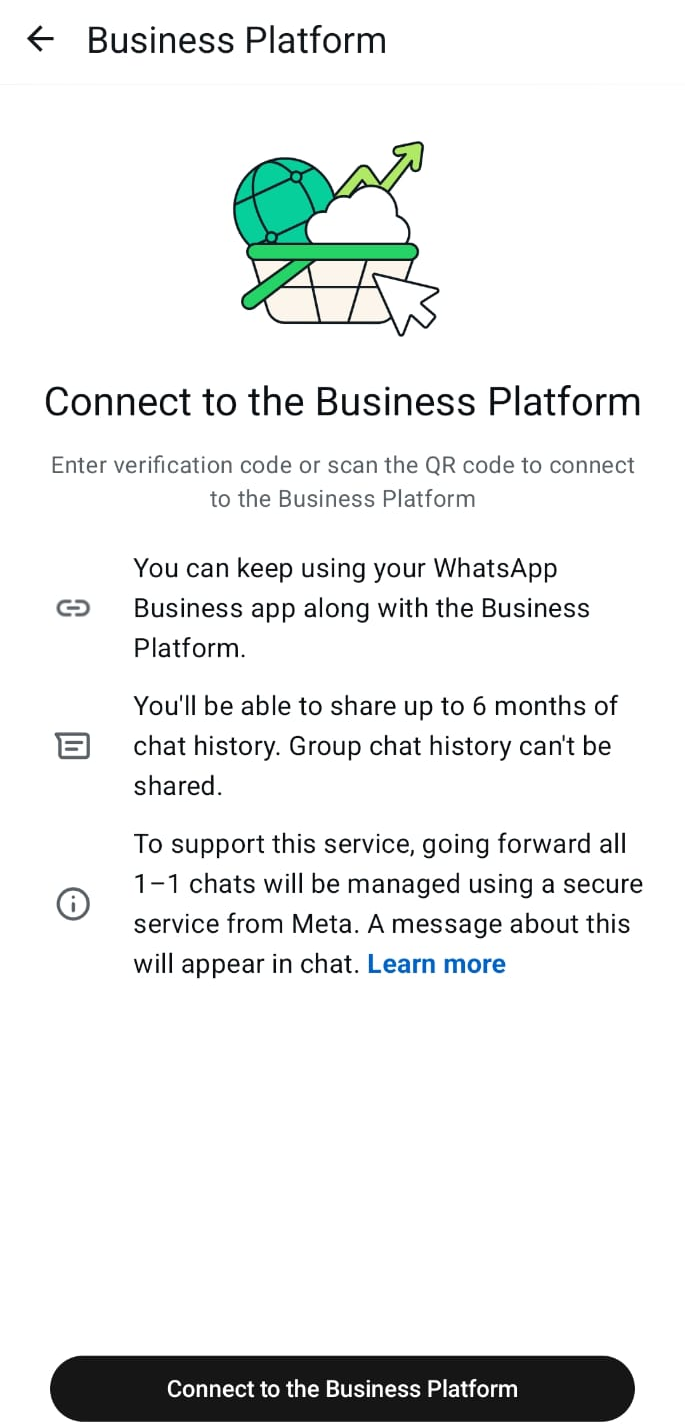
The app confirms: you keep using WhatsApp Business alongside the platform. Tap Connect. · Real screenshot from an actual connect.
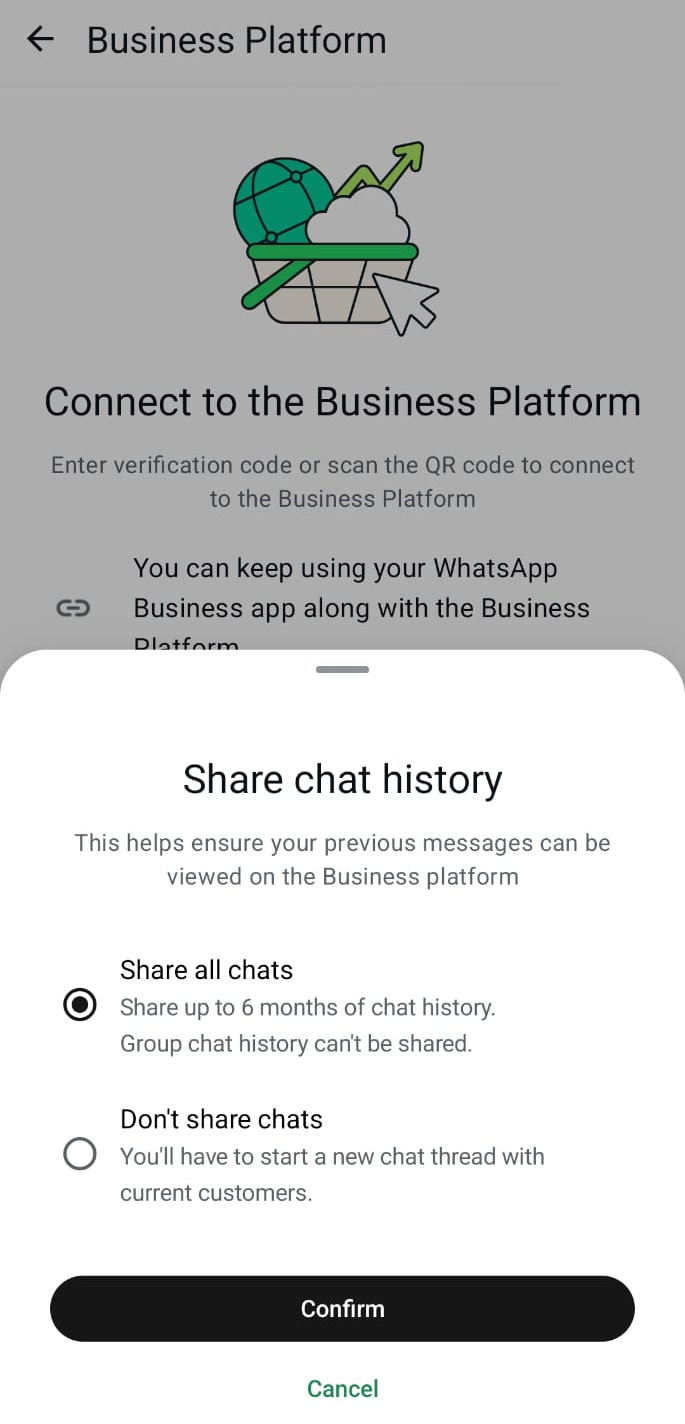
Choose “Share all chats” — that's what fills your inbox with your last 6 months of conversations. · Real screenshot from an actual connect.
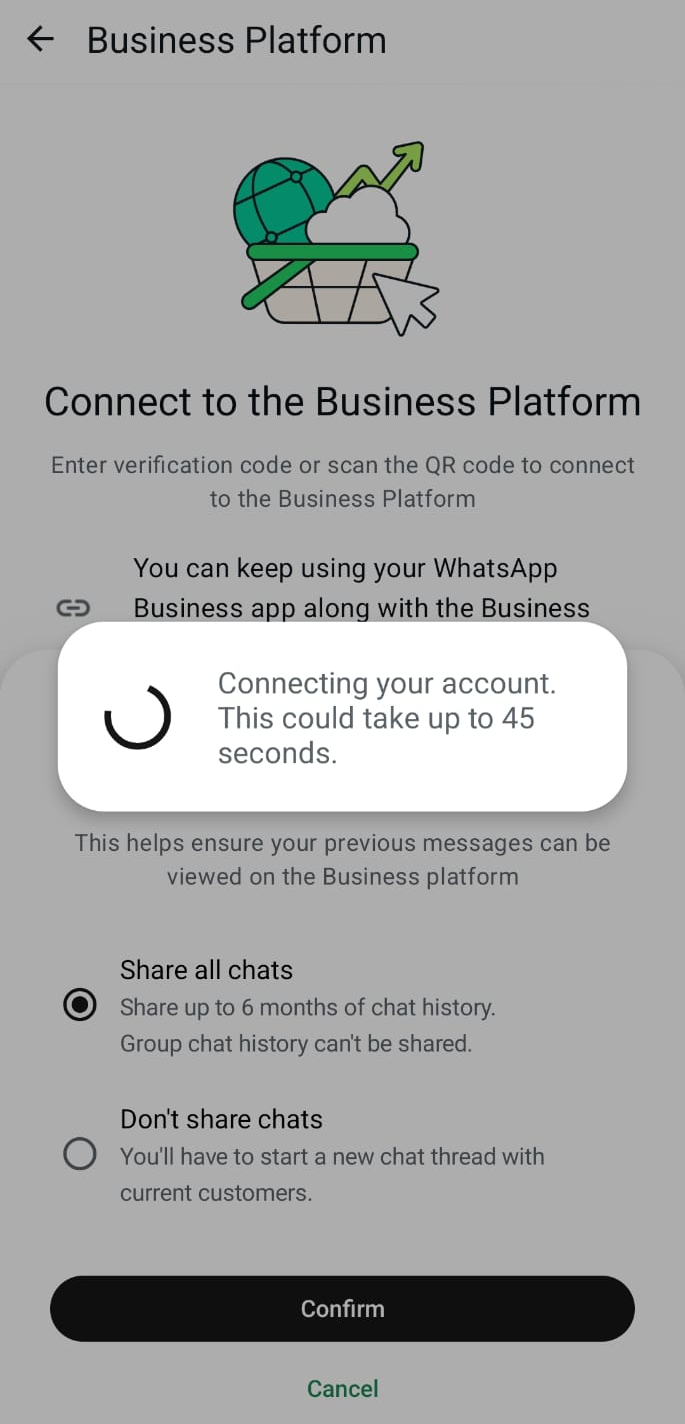
Up to 45 seconds of connecting… · Real screenshot from an actual connect.
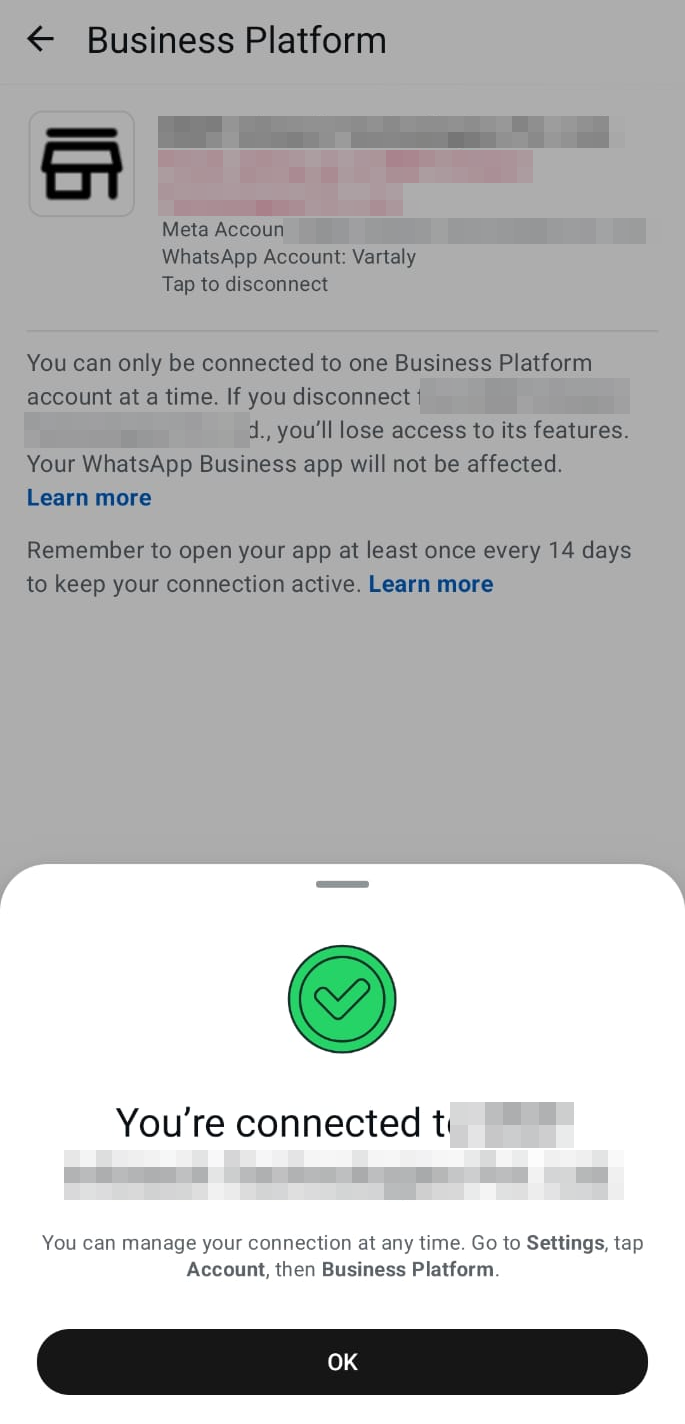
Done — the app shows the connection and your new WhatsApp Business account. · Real screenshot from an actual connect.
WhatsApp’s own screen says it: open your WhatsApp Business app at least once every 14 days to keep the coexistence connection active. Normal usage covers this automatically — just don’t retire the phone entirely.
Name your WhatsApp Business account
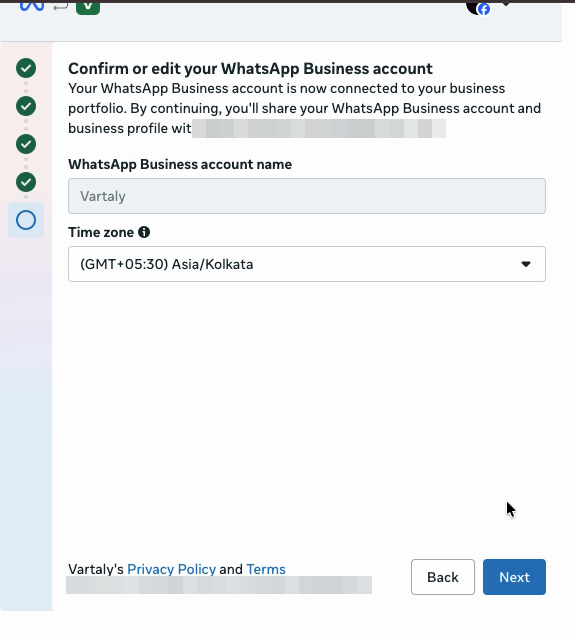
The account name is internal (customers see your display name); time zone auto-fills. · Real screenshot from an actual connect.
Review and confirm
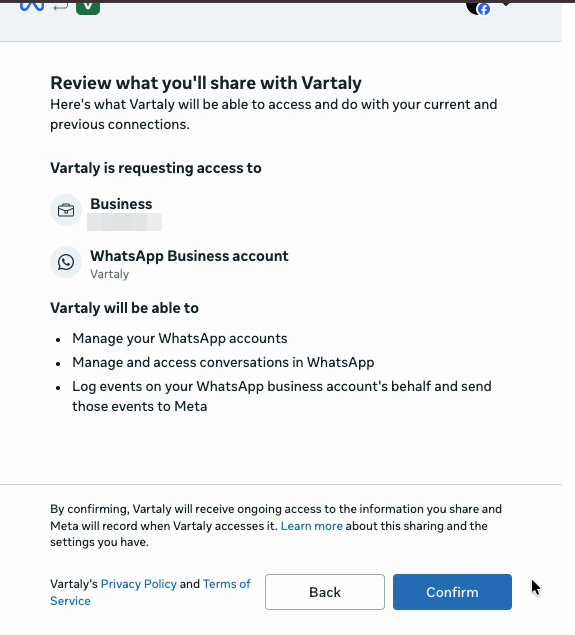
A plain-language summary of the access being granted. Hit Confirm. · Real screenshot from an actual connect.
Done — you’re live
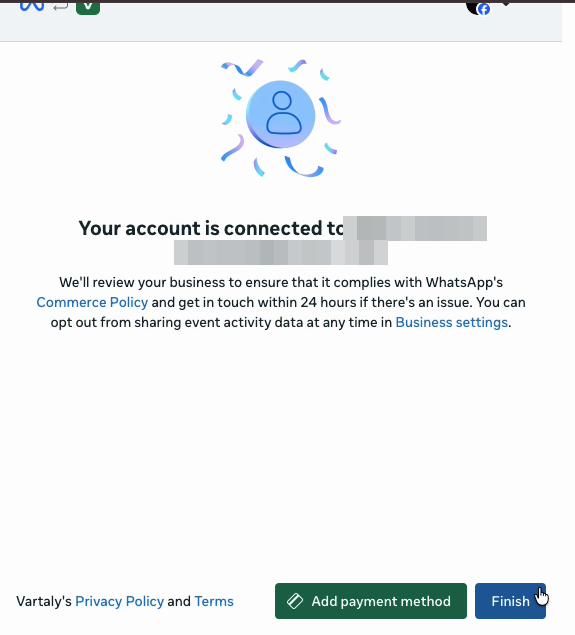
Click Finish — you land back in your dashboard, connected, with your chat history importing. · Real screenshot from an actual connect.
Back in Vartaly, the page shows “WhatsApp connected” and your chat history import progress. Everything you built in your demo — menus, bookings, payments — starts answering on your real number. Send a “Hi” from another phone and watch it reply.
You may also see a small “Add payment method” button on the final screen — that’s Meta’s own per-conversation billing, optional at this stage; replies to customers work without it.
If something goes wrong
The one error worth knowing in advance: “Your WhatsApp Business account is currently restricted” right after creating a brand-new portfolio. It happens on every platform, it’s Meta’s automated caution with new accounts, and it clears with an ID review — usually within 48 hours, with your signup progress saved. Full steps: the restricted-account guide.
Popup never opened? Check your browser’s popup blocker. Got lost mid-way? Close the popup and click Connect again — Meta remembers your progress.
Most of our customers don’t. Our team connects your number with you on a call — you just approve. Free, included with every plan.